


-

- About 30 minutes
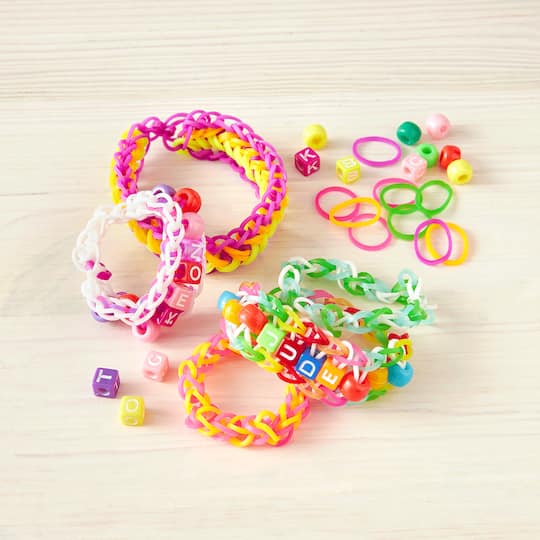
rainbow loom® alphabet ladder bracelet
| Step 1 |
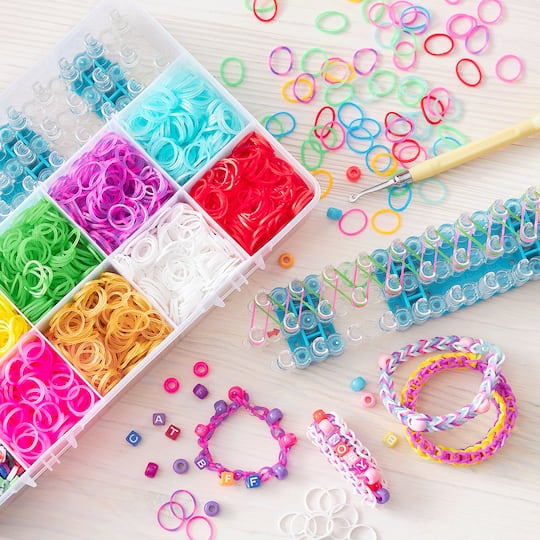
First, choose ten beads and rubbers bands for the centre of your bracelet. Pinch a rubber band and thread it through a bead so the bead is in the centre of the rubber band. Set aside. |
| Step 2 |
Now, choose 26 rubber bands for the outside of your bracelet. With the arrows facing away from you on the loom, stretch one rubber band from the first centre peg diagonally over to the first peg on the left. |
| Step 3 |
Stretch another rubber band from the first peg on the left up to the second peg on the left. Stretch a rubber band from the second peg up to the third peg. Continue adding rubber bands in this pattern up the left side but leave the last (13th) peg open. |
| Step 4 |
Stretch a rubber from the twelfth peg diagonally to the last (13th) peg in the centre. |
| Step 5 |
Repeat Steps 2-4 on the right side. |
| Step 6 |
Take another rubber and wrap it twice around the 13th peg in the centre column to “cap” the peg. |
| Step 7 |
Take a beaded rubber band you set aside in Step 1 and stretch each one across the loom from the second peg on the left to the second peg on the right. Add the remaining beaded rubber bands up the loom, one peg at a time in a ladder-type fashion. |
| Step 8 |
Turn the loom around so the arrows are pointing towards you where the capped peg is now the first, centre peg. |
| Step 9 |
Reach your hook inside the first centre peg, pull back the cap band and grasp the top rubber band on the peg. Carefully pull it up through the peg and move it to the forward peg on the left. |
| Step 10 |
Reach your hook inside that same forward left and grasp the rubber band on the peg. Carefully pull it up through the peg and move it straight forward to the next peg. Continue this pattern up the left side. |
| Step 11 |
When you get to the last peg, move the rubber band to the last centre peg. |
| Step 12 |
Repeat Steps 9-11 on the right side. |
| Step 13 |
Reach your hook in the last centre peg, all the way through all the rubber bands on the peg and place a rubber band on the hook. While holding the opposite side of the rubber band, pull the rubber band back through the peg and place the side you are holding onto your hook. |
| Step 14 |
Carefully remove your bracelet from the loom by slowing rocking it back and forth while lifting it off the loom. |
| Step 15 |
To add an extender, add six (or seven) bands, depending on the size needed, up the right side of the loom. Stretch one band from the first to the second peg, one from the second to the third and so on. |
| Step 16 |
Now, add the rubber band on your hook with your bracelet over the last peg with a rubber band to act as a cap. |
| Step 17 |
Turn your loom around. |
| Step 18 |
Reach your hook inside the peg, move the “cap” band back and grasp the rubber band on the peg. Move it to the forward peg. Continue up the loom until you reach the last rubber band. |
| Step 19 |
Attach a c-clip to the folded loops of the last band. |
| Step 20 |
Finally, add the cap band on the opposite end of your bracelet to the c-clip to close the bracelet. |
Products

| Step 1 |
First, choose ten beads and rubbers bands for the centre of your bracelet. Pinch a rubber band and thread it through a bead so the bead is in the centre of the rubber band. Set aside. |
| Step 2 |
Now, choose 26 rubber bands for the outside of your bracelet. With the arrows facing away from you on the loom, stretch one rubber band from the first centre peg diagonally over to the first peg on the left. |
| Step 3 |
Stretch another rubber band from the first peg on the left up to the second peg on the left. Stretch a rubber band from the second peg up to the third peg. Continue adding rubber bands in this pattern up the left side but leave the last (13th) peg open. |
| Step 4 |
Stretch a rubber from the twelfth peg diagonally to the last (13th) peg in the centre. |
| Step 5 |
Repeat Steps 2-4 on the right side. |
| Step 6 |
Take another rubber and wrap it twice around the 13th peg in the centre column to “cap” the peg. |
| Step 7 |
Take a beaded rubber band you set aside in Step 1 and stretch each one across the loom from the second peg on the left to the second peg on the right. Add the remaining beaded rubber bands up the loom, one peg at a time in a ladder-type fashion. |
| Step 8 |
Turn the loom around so the arrows are pointing towards you where the capped peg is now the first, centre peg. |
| Step 9 |
Reach your hook inside the first centre peg, pull back the cap band and grasp the top rubber band on the peg. Carefully pull it up through the peg and move it to the forward peg on the left. |
| Step 10 |
Reach your hook inside that same forward left and grasp the rubber band on the peg. Carefully pull it up through the peg and move it straight forward to the next peg. Continue this pattern up the left side. |
| Step 11 |
When you get to the last peg, move the rubber band to the last centre peg. |
| Step 12 |
Repeat Steps 9-11 on the right side. |
| Step 13 |
Reach your hook in the last centre peg, all the way through all the rubber bands on the peg and place a rubber band on the hook. While holding the opposite side of the rubber band, pull the rubber band back through the peg and place the side you are holding onto your hook. |
| Step 14 |
Carefully remove your bracelet from the loom by slowing rocking it back and forth while lifting it off the loom. |
| Step 15 |
To add an extender, add six (or seven) bands, depending on the size needed, up the right side of the loom. Stretch one band from the first to the second peg, one from the second to the third and so on. |
| Step 16 |
Now, add the rubber band on your hook with your bracelet over the last peg with a rubber band to act as a cap. |
| Step 17 |
Turn your loom around. |
| Step 18 |
Reach your hook inside the peg, move the “cap” band back and grasp the rubber band on the peg. Move it to the forward peg. Continue up the loom until you reach the last rubber band. |
| Step 19 |
Attach a c-clip to the folded loops of the last band. |
| Step 20 |
Finally, add the cap band on the opposite end of your bracelet to the c-clip to close the bracelet. |