


-

- About 30 minutes
Intermediate
You're somewhat experienced with the skills necessary to complete this project, but you haven't mastered all the elements, yet.
penny spinner
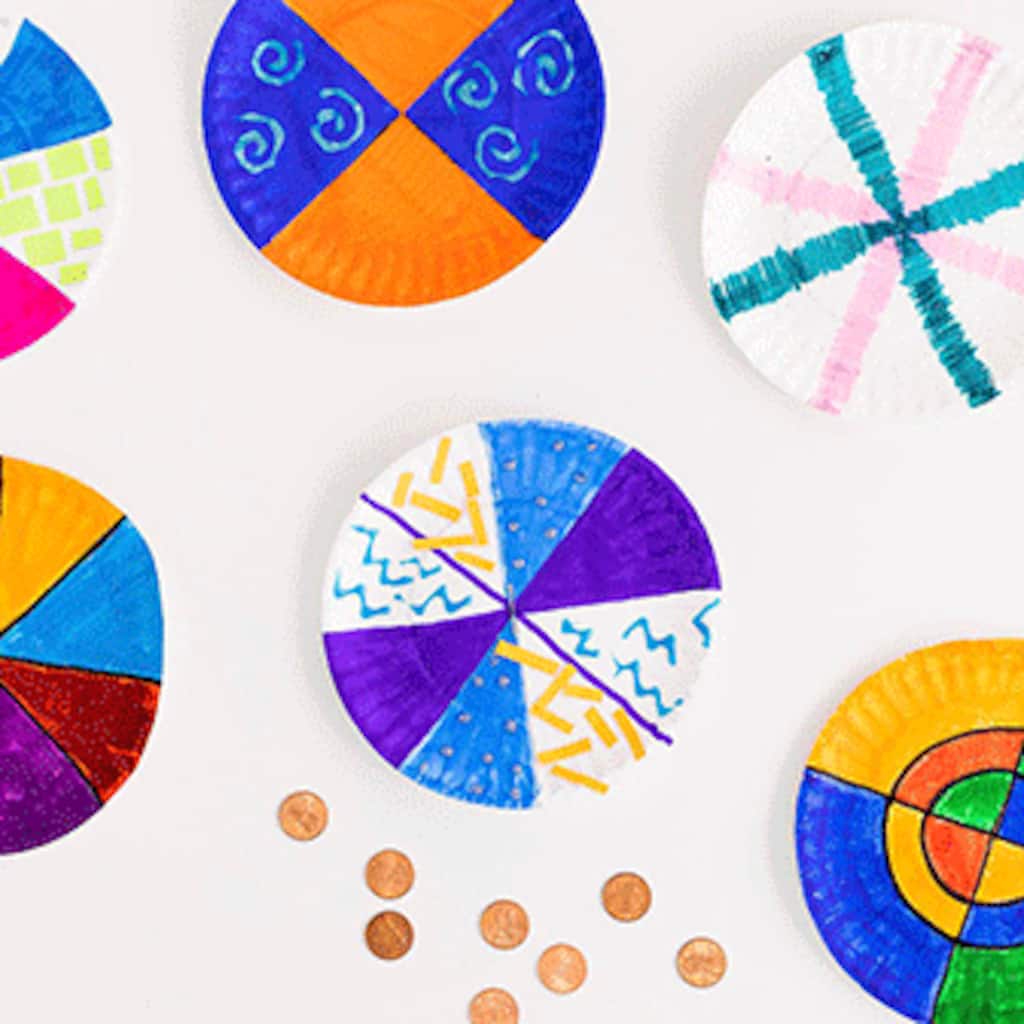
This mesmerising spinner teaches kids about geometry, physics and art.
| Step 1 |
| Use a round object (such as a dinner plate) to trace a circle onto a piece of poster board. Cut out the circle. |
| Step 2 |
| Find the centre of the circle and divide the circle into quadrants, like a pie. Then, decorate each quadrant. TIP: Penny spinners look best when the decorations are done with lots of bold colours. Check out these decoration ideas: - Use markers to create deep, dark colours. - Cut small scraps of construction paper and glue them into the quadrants. - Use metallic or glitter glue to make swirls or designs in one. |
| Step 3 |
| ADULT: Cut a slit that is just a bit smaller than a penny in the centre of your circle. Push the penny through the centre slit so that about half the penny sticks out on each side. Add a small dot of white school glue to hold the penny in place. Let dry. |
| Step 4 |
| Set the spinner down and spin away! Share your project photos with #MakeItWithMichaels |
Supplies
Materials
Materials
https://canada.michaels.com/en/penny-spinner/B_89316.html
Products

https://canada.michaels.com/en/8x10-foam-boards-5ct/10185624.html
You’ll Also Need
- Pennies
- Ruler
- Pencil
- Round Object (Such as a Dinner Plate)
Instructions
| Step 1 |
| Use a round object (such as a dinner plate) to trace a circle onto a piece of poster board. Cut out the circle. |
| Step 2 |
| Find the centre of the circle and divide the circle into quadrants, like a pie. Then, decorate each quadrant. TIP: Penny spinners look best when the decorations are done with lots of bold colours. Check out these decoration ideas: - Use markers to create deep, dark colours. - Cut small scraps of construction paper and glue them into the quadrants. - Use metallic or glitter glue to make swirls or designs in one. |
| Step 3 |
| ADULT: Cut a slit that is just a bit smaller than a penny in the centre of your circle. Push the penny through the centre slit so that about half the penny sticks out on each side. Add a small dot of white school glue to hold the penny in place. Let dry. |
| Step 4 |
| Set the spinner down and spin away! Share your project photos with #MakeItWithMichaels |