


-

- 15 minutes or less
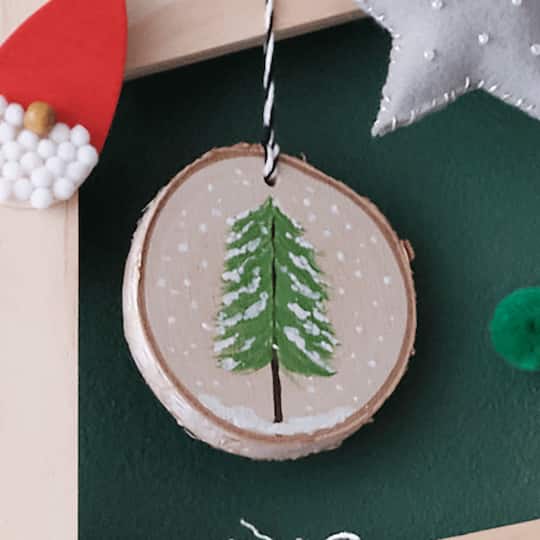
painted tree wood circle ornament
| Step 1 |
Lightly draw the trunk of the tree down the middle of the wood slice ornament. Then, lightly draw branches coming down the tree and whisping out from the trunk. |
| Step 2 |
Paint the trunk line using Cocoa Bean. Vary the line slightly as you paint to give it thick and thin areas. Let dry. |
| Step 3 |
Use one of the green paints and paint your whispy tree branches. Let dry. |
| Step 4 |
Use the other green paint and paint over the branches allowing some of the green from under to show through; then let dry. |
| Step 5 |
Dab some white paint onto the branches, add white dots in the background and white paint bottom of the tree to resemble snow. Let dry. |
| Step 6 |
Cut a piece of twine about 4" [10 cm] long. Fold it in half to make a loop for hanging and hot glue the ends to the top, back of the ornament. |
-

-
 20000629You’ll Need: 1Item # 10371004
Promotions
$1.99- Color: White
- Size: 2 oz
- Color: White
- Size: 2 oz
- Color: White
- Size: 2 oz
-
 20000629You’ll Need: 1Item # 10371024
Promotions
$1.99- Color: Fern Green
- Size: 2 oz
- Color: Fern Green
- Size: 2 oz
- Color: Fern Green
- Size: 2 oz
-
 20000629You’ll Need: 1Item # 10371067
Promotions
$1.99- Color: Cocoa Bean
- Size: 2 oz
- Color: Cocoa Bean
- Size: 2 oz
- Color: Cocoa Bean
- Size: 2 oz
-
 20000629You’ll Need: 1Item # 10371025
Promotions
$1.99- Color: Crisp Green
- Size: 2 oz
- Color: Crisp Green
- Size: 2 oz
- Color: Crisp Green
- Size: 2 oz
Products
-
 You’ll Need: 1Item # 10122057
Promotions
$7.99 -
 *No additional coupons or discounts may be applied.
Products
- Pencil
- Paper Plate (or Paint Palette)
- 1 - Birchwood Round Christmas Ornament by ArtMinds™ (10641521)
| Step 1 |
Lightly draw the trunk of the tree down the middle of the wood slice ornament. Then, lightly draw branches coming down the tree and whisping out from the trunk. |
| Step 2 |
Paint the trunk line using Cocoa Bean. Vary the line slightly as you paint to give it thick and thin areas. Let dry. |
| Step 3 |
Use one of the green paints and paint your whispy tree branches. Let dry. |
| Step 4 |
Use the other green paint and paint over the branches allowing some of the green from under to show through; then let dry. |
| Step 5 |
Dab some white paint onto the branches, add white dots in the background and white paint bottom of the tree to resemble snow. Let dry. |
| Step 6 |
Cut a piece of twine about 4" [10 cm] long. Fold it in half to make a loop for hanging and hot glue the ends to the top, back of the ornament. |