
 Print Project
-

- Over an hour
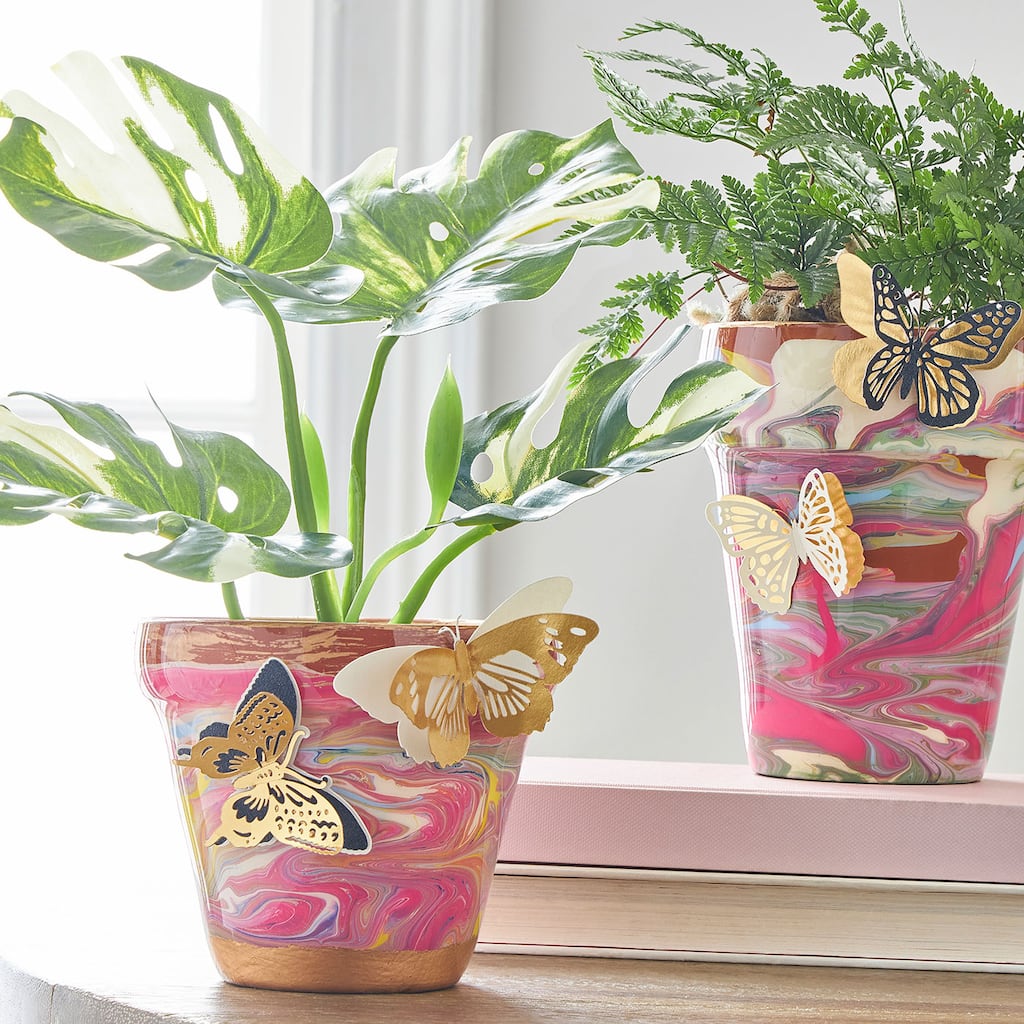
butterfly embellished marble clay pots
| Step 1 |
First, cover your working surface with a disposable table covering and put on a pair of the gloves included in the prep kit. |
| Step 2 |
Carefully place your first clay pot onto the spring arm of your tumbler turner. You will want to squeeze the four spring pieces together with one hand while placing the pot onto the arm with the other hand. |
| Step 3 |
Turn on your turner and pour some of the first paint onto the pot, randomly. |
| Step 4 |
Now, randomly pour some of your next paint onto your pot. Continue adding paints while alternating the paint order, placement and amount. Once you are happy with the paint pour added, leave the turner on the fastest speed for a few hours to let the marbling settle, level and start to dry; then turn it down low to let the paint completely dry. |
| Step 5 |
Carefully remove the pot from the spring arm and place on a piece of palette paper to let dry completely. |
| Step 6 |
Add some liquid gilding around the rim and/or the bottom. Let dry. |
| Step 7 |
Return your pot to the spring arm. |
| Step 8 |
Put on a pair of the gloves included in the prep kit and read instructions included with resin thoroughly before you start to mix epoxy. Mix only what is needed for one layer at a time (about 20ml of each part). |
| Step 9 |
Turn on the tool to a medium-slow speed and pour a little of your epoxy mixture onto your pot. Spread it evenly around the outside of your pot. Turn the speed up a little and run your glove-covered fingers over the pot in long even strokes to continue to spread the epoxy evenly. |
| Step 10 |
Turn the tool to the highest speed and allow your pot to spin on the Spin It™ tool for four (to six) hours. |
| Step 11 |
Click here for design in Cricut® Design Space™ and butterflies from linen, foil and glitter cardstock. |
| Step 12 |
Fold on the score line where applicable then use hot glue to assemble your butterflies. |
| Step 13 |
Hot glue butterflies onto your pot were desired. |
-
 ia-can-os-craft-paintYou’ll Need: 1Item # 10014830
Promotions
$13.99- Color: Classic Gold
- Size: .75 oz
- Color: Classic Gold
- Size: .75 oz
- Color: Classic Gold
- Size: .75 oz
-
 809188527You’ll Need: 1Item # 10142583
Promotions
$3.49- Color: Ebony
- Size: 12" x 12"
- Color: Ebony
- Size: 12" x 12"
- Color: Ebony
- Size: 12" x 12"
-
 809188527You’ll Need: 1Item # 10151246
Promotions
$1.29ea.- Color: Natural
- Size: 12" x 12"
- Color: Natural
- Size: 12" x 12"
- Color: Natural
- Size: 12" x 12"
-

-
 910538885You’ll Need: 1Item # 10327064
Promotions
$2.99- Color: Orange
- Size: 4 in
- Color: Orange
- Size: 4 in
- Color: Orange
- Size: 4 in
-
 926203319You’ll Need: 1Item # 10622538
Promotions
$9.49- Color: Bright Yellow
- Size: 8 oz
- Color: Bright Yellow
- Size: 8 oz
- Color: Bright Yellow
- Size: 8 oz
-
 926203319You’ll Need: 1Item # 10622541
Promotions
$9.49- Color: Emerald Green
- Size: 8 oz
- Color: Emerald Green
- Size: 8 oz
- Color: Emerald Green
- Size: 8 oz
-
 926203319You’ll Need: 1Item # 10622542
Promotions
$9.49- Color: Sky Blue
- Size: 8 oz
- Color: Sky Blue
- Size: 8 oz
- Color: Sky Blue
- Size: 8 oz
-
 926203319You’ll Need: 1Item # 10622550
Promotions
$9.49- Color: Ivory
- Size: 8 oz
- Color: Ivory
- Size: 8 oz
- Color: Ivory
- Size: 8 oz
-
 926203319You’ll Need: 1Item # 10622551
Promotions
$9.49- Color: Beige
- Size: 8 oz
- Color: Beige
- Size: 8 oz
- Color: Beige
- Size: 8 oz
-
 926203319You’ll Need: 1Item # 10622555
Promotions
$9.49- Color: Fuchsia
- Size: 8 oz
- Color: Fuchsia
- Size: 8 oz
- Color: Fuchsia
- Size: 8 oz
-
 809188528You’ll Need: 1Item # 10656846
Promotions
$11.99- Color: Matte Gold
- Size: 8.5" x 11"
- Color: Matte Gold
- Size: 8.5" x 11"
- Color: Matte Gold
- Size: 8.5" x 11"
-

Products
 Tools
Tools
Tools
Tools
-

-

-

-
 You’ll Need: 1Item # 10669043
Promotions
$399.99
Products
 You’ll Also Need
- Computer
| Step 1 |
First, cover your working surface with a disposable table covering and put on a pair of the gloves included in the prep kit. |
| Step 2 |
Carefully place your first clay pot onto the spring arm of your tumbler turner. You will want to squeeze the four spring pieces together with one hand while placing the pot onto the arm with the other hand. |
| Step 3 |
Turn on your turner and pour some of the first paint onto the pot, randomly. |
| Step 4 |
Now, randomly pour some of your next paint onto your pot. Continue adding paints while alternating the paint order, placement and amount. Once you are happy with the paint pour added, leave the turner on the fastest speed for a few hours to let the marbling settle, level and start to dry; then turn it down low to let the paint completely dry. |
| Step 5 |
Carefully remove the pot from the spring arm and place on a piece of palette paper to let dry completely. |
| Step 6 |
Add some liquid gilding around the rim and/or the bottom. Let dry. |
| Step 7 |
Return your pot to the spring arm. |
| Step 8 |
Put on a pair of the gloves included in the prep kit and read instructions included with resin thoroughly before you start to mix epoxy. Mix only what is needed for one layer at a time (about 20ml of each part). |
| Step 9 |
Turn on the tool to a medium-slow speed and pour a little of your epoxy mixture onto your pot. Spread it evenly around the outside of your pot. Turn the speed up a little and run your glove-covered fingers over the pot in long even strokes to continue to spread the epoxy evenly. |
| Step 10 |
Turn the tool to the highest speed and allow your pot to spin on the Spin It™ tool for four (to six) hours. |
| Step 11 |
Click here for design in Cricut® Design Space™ and butterflies from linen, foil and glitter cardstock. |
| Step 12 |
Fold on the score line where applicable then use hot glue to assemble your butterflies. |
| Step 13 |
Hot glue butterflies onto your pot were desired. |