


-

- About an hour
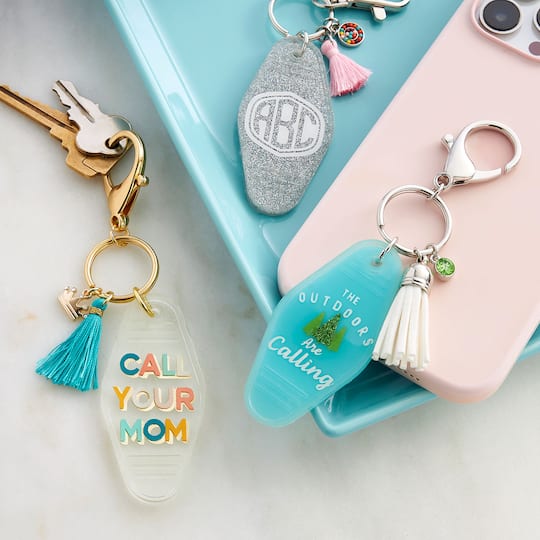
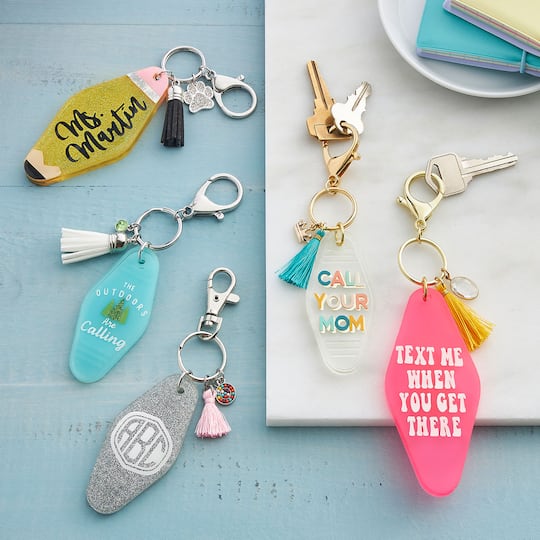
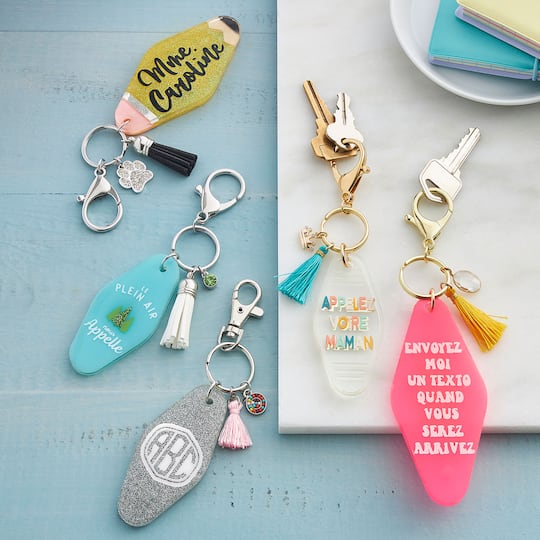
vintage hotel resin keychain
| Step 1 |
Follow instructions on packaging to mix resin. You only enough to cover the bottom surface of your mould. |
| Step 2 |
Pour resin into mould. Use a toothpick to help move the resin so it completely covers the bottom of the surface and to pop any bubbles. Set aside to cure overnight. |
| Step 3 |
Create a design or a quote in Cricut® Design Space™ and cut from vinyl. |
| Step 4 |
Use transfer tape to add vinyl design to cured resin in mould. Burnish to make sure all edges of the vinyl are bonded to resin. |
| Step 5 |
Mix a top layer of clear resin and pour into your mould as you did in Steps 1-2. Set aside to cure overnight. |
| Step 6 |
Carefully remove your shape from the mould. |
| Step 7 |
Attach your keyring to the hole at the top of your resin shape with a jump ring. |
| Step 8 |
Embellish your keyring with a tassel from Bead Landing™ and/or a charm from a large assortment of options from Charmalong™ by Bead Landing™. |
-
 876270917You’ll Need: 1Item # 10528927
Promotions
$7.99- Color: Brown
- Size: 5.875 in
- Count: 60
- Color: Brown
- Size: 5.875 in
- Count: 60
- Color: Brown
- Size: 5.875 in
- Count: 60
-
 You’ll Need: 1Item # 10473894
Promotions
$5.99 -

-

-
 20000586You’ll Need: 1Item # 10628841$8.99
- Color: White
- Size: 5.5" x 48"
- Color: White
- Size: 5.5" x 48"
- Color: White
- Size: 5.5" x 48"
-

-
 20000586You’ll Need: 1Item # 10628868$12.99
- Color: Gold
- Size: 5.5" x 48"
- Color: Gold
- Size: 5.5" x 48"
- Color: Gold
- Size: 5.5" x 48"
-

Products
Products


- Computer
- Disposable Cups
- Toothpick
- 1 - 50Pc. 12mm Gold Jumpring by Bead Landing™ (10697457)
- 1 - Cricut Joy™ Machine (D353373S)
| Step 1 |
Follow instructions on packaging to mix resin. You only enough to cover the bottom surface of your mould. |
| Step 2 |
Pour resin into mould. Use a toothpick to help move the resin so it completely covers the bottom of the surface and to pop any bubbles. Set aside to cure overnight. |
| Step 3 |
Create a design or a quote in Cricut® Design Space™ and cut from vinyl. |
| Step 4 |
Use transfer tape to add vinyl design to cured resin in mould. Burnish to make sure all edges of the vinyl are bonded to resin. |
| Step 5 |
Mix a top layer of clear resin and pour into your mould as you did in Steps 1-2. Set aside to cure overnight. |
| Step 6 |
Carefully remove your shape from the mould. |
| Step 7 |
Attach your keyring to the hole at the top of your resin shape with a jump ring. |
| Step 8 |
Embellish your keyring with a tassel from Bead Landing™ and/or a charm from a large assortment of options from Charmalong™ by Bead Landing™. |