


-

- About 30 minutes
liquitex® heavy body antiqued floral tin
| Step 1 |
Cover your work surface with a disposable covering. |
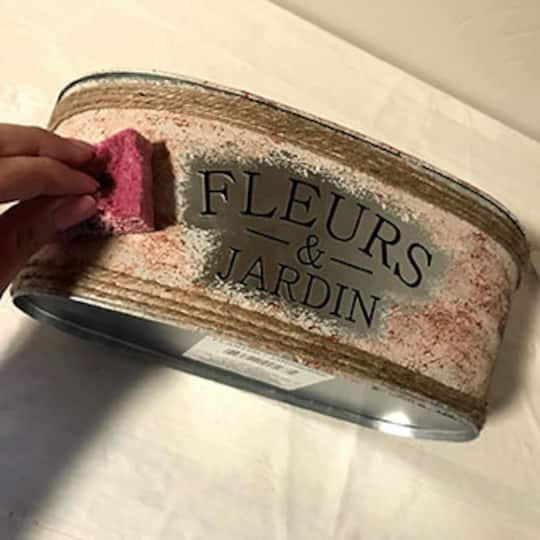
| Step 2 |
Apply Light Pink for the first layer of paint. Squeeze a quarter-sized amount of paint out of the tube and onto a palette (or plate). Dip your sponge into the paint and begin applying it to the planter, covering it completely with an even coating. |
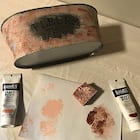
| Step 3 |
Next, apply a layer of Iridescent Rich Copper. Again, squeeze a quarter-sized amount of paint onto a palette (or plate). Allow your paint to dry completely. |
| Step 4 |
To add the twine, first decide where you would like to have it wrap around your planter. Place a dot of hot glue on the area where you would like the twine to be placed and then press it into the glue to secure. Wrap the twine around the planter as many times as you want, then place a second dot of hot glue to secure the opposite end of your twine. |
| Step 5 |
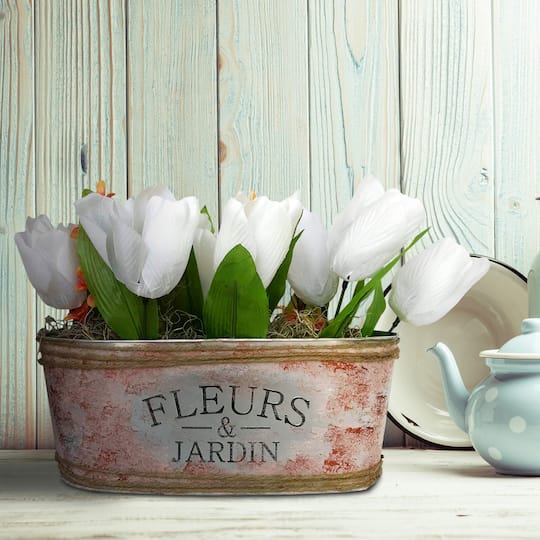
Place flower arrangement into planter to complete. |
-

-
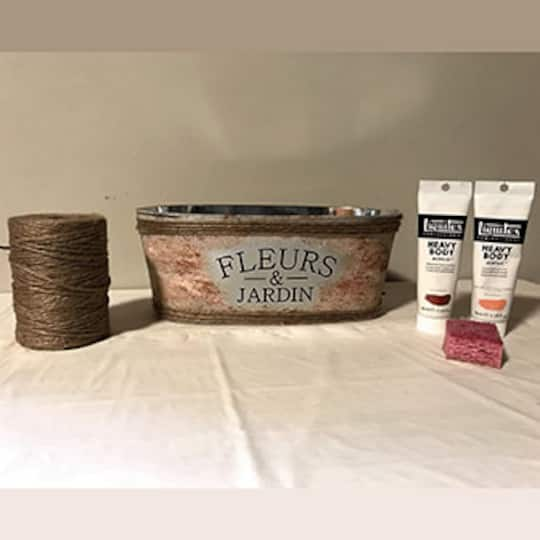
 845161011You’ll Need: 1Item # 10010730
Promotions
$12.99- Color: Light Pink
- Size: 2 oz
- Color: Light Pink
- Size: 2 oz
- Color: Light Pink
- Size: 2 oz
Products
Products


- Plastic Disposable Table Covering
- Floral Arrangement or Filler
- Apron
| Step 1 |
Cover your work surface with a disposable covering. |
| Step 2 |
Apply Light Pink for the first layer of paint. Squeeze a quarter-sized amount of paint out of the tube and onto a palette (or plate). Dip your sponge into the paint and begin applying it to the planter, covering it completely with an even coating. |
| Step 3 |
Next, apply a layer of Iridescent Rich Copper. Again, squeeze a quarter-sized amount of paint onto a palette (or plate). Allow your paint to dry completely. |
| Step 4 |
To add the twine, first decide where you would like to have it wrap around your planter. Place a dot of hot glue on the area where you would like the twine to be placed and then press it into the glue to secure. Wrap the twine around the planter as many times as you want, then place a second dot of hot glue to secure the opposite end of your twine. |
| Step 5 |
Place flower arrangement into planter to complete. |