


-

- About an hour
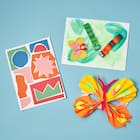
buckeye butterfly mask
| Step 1 |
Stack the two sheets of construction paper on top of each other (hold horizontally) and round off all four corners with scissors to make your wings. |
| Step 2 |
Fold two new sheets of construction paper and cut out a large and a small circle to use to accent your wings. |
| Step 3 |
Repeat Step 2 with two more sheets of folded construction paper, but this time cut large tear drops. |
| Step 4 |
Glue the shapes to your wings from Step 1. Make sure the placement of shapes you glue to the right side are repeated on the left side. |
| Step 5 |
Fold the horizontal paper like a fan with ½" [1.2 cm] folds. Repeat on the second sheet of decorated paper. |
| Step 6 |
Place the “fans” on top of one another. The top “fan” will be the butterfly’s top set on wings, and the bottom “fan” will be the bottom set of wings. Fold the layered fans in half. |
| Step 7 |
Tape together at the folded crease. |
| Step 8 |
Turn the wings over and place glue along the back creases. |
| Step 9 |
Place the folded crease (the part with tape) to rest at the top of the nose. Spread your wings to cover the mask but be careful to avoid eye openings. Add more glue to areas if needed. Let dry. |
| Step 10 |
Wrap the middle of the butterfly with chenille pipe cleaners from the tip of the nose to the top of the mask bend snug to mask. Weave 4"- 5" [10.2 cm - 12.7 cm] of chenille pipe cleaners through the top loop of the butterfly head and twist to secure the antennas. |
| Step 11 |
Add beads to the tip of the antennas if desired. |
| Step 12 |
Attach the elastic at both holes, by tying on each side. |
Products


- Household Tape
| Step 1 |
Stack the two sheets of construction paper on top of each other (hold horizontally) and round off all four corners with scissors to make your wings. |
| Step 2 |
Fold two new sheets of construction paper and cut out a large and a small circle to use to accent your wings. |
| Step 3 |
Repeat Step 2 with two more sheets of folded construction paper, but this time cut large tear drops. |
| Step 4 |
Glue the shapes to your wings from Step 1. Make sure the placement of shapes you glue to the right side are repeated on the left side. |
| Step 5 |
Fold the horizontal paper like a fan with ½" [1.2 cm] folds. Repeat on the second sheet of decorated paper. |
| Step 6 |
Place the “fans” on top of one another. The top “fan” will be the butterfly’s top set on wings, and the bottom “fan” will be the bottom set of wings. Fold the layered fans in half. |
| Step 7 |
Tape together at the folded crease. |
| Step 8 |
Turn the wings over and place glue along the back creases. |
| Step 9 |
Place the folded crease (the part with tape) to rest at the top of the nose. Spread your wings to cover the mask but be careful to avoid eye openings. Add more glue to areas if needed. Let dry. |
| Step 10 |
Wrap the middle of the butterfly with chenille pipe cleaners from the tip of the nose to the top of the mask bend snug to mask. Weave 4"- 5" [10.2 cm - 12.7 cm] of chenille pipe cleaners through the top loop of the butterfly head and twist to secure the antennas. |
| Step 11 |
Add beads to the tip of the antennas if desired. |
| Step 12 |
Attach the elastic at both holes, by tying on each side. |