
-

- About an hour
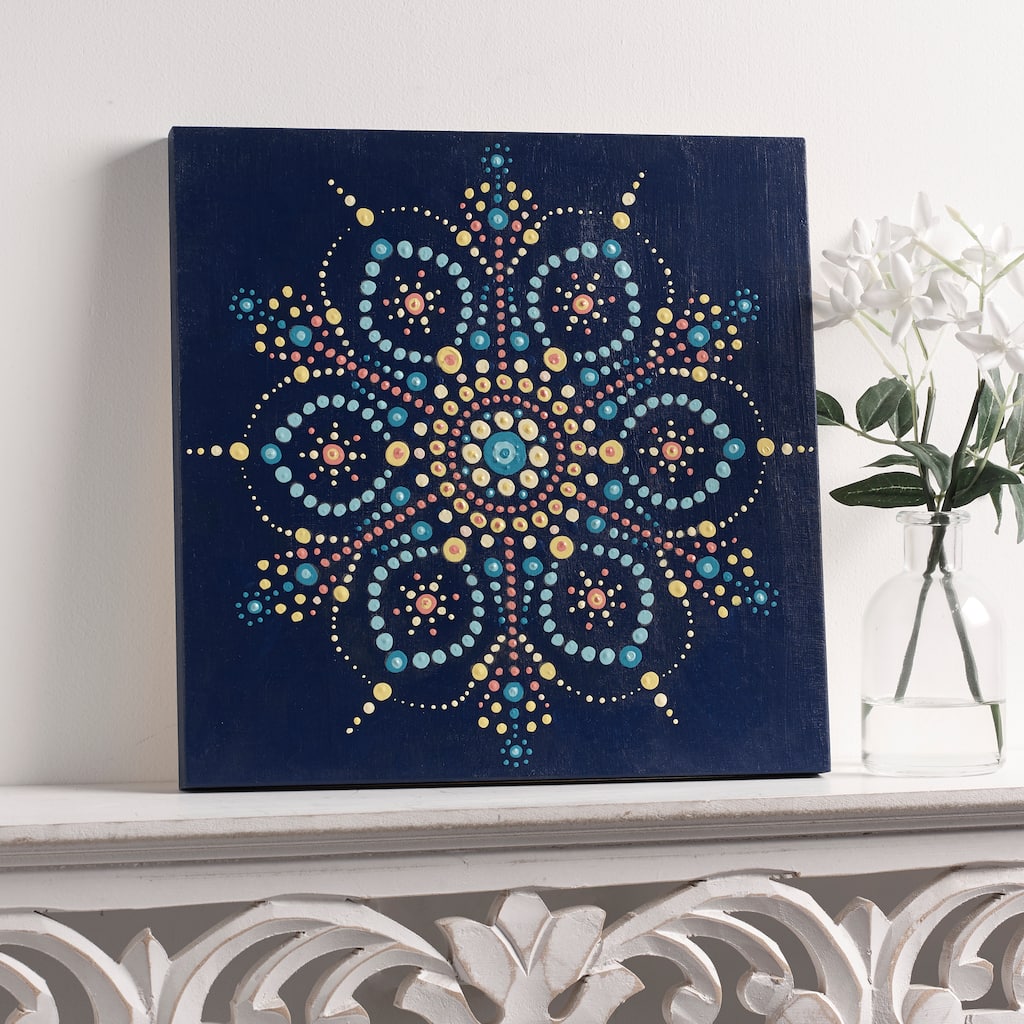
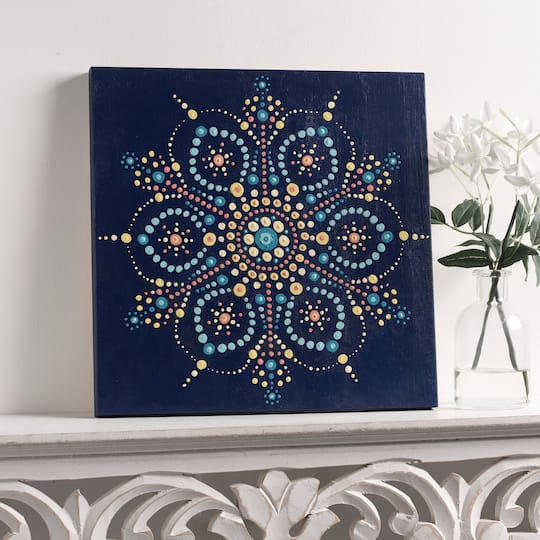
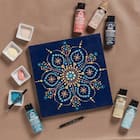
blue mandala wood panel
| Step 1 |
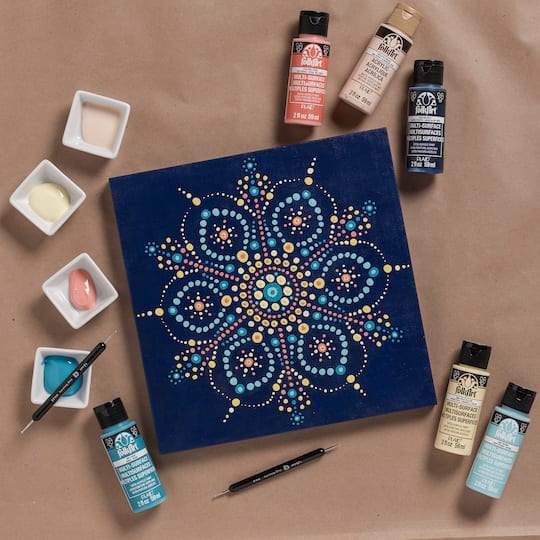
Use your 1" [2.54 cm] flat brush to paint your entire canvas with Ink Spot acrylic paint. Let dry. |
| Step 2 |
Click here to download and print the template. |
| Step 3 |
Cut out an 11" x 11" [27.94 cm x 27.94 cm] piece of transfer paper. Tape the transfer paper to the sides of your canvas. Tape the mandala pattern down on the centre of your canvas. Make sure the waxy side of your transfer paper is flush to your canvas. Tape the pattern on top of your transfer paper. |
| Step 4 |
Use your pencil to trace every dot on your pattern. |
| Step 5 |
Remove the pattern and transfer paper from your canvas. |
| Step 6 |
Use your dotter tools and multi-surface satin acrylic paints to make dots on your mandala pattern until your pattern is filled in. Use the appropriately sized dotter tool for each dot. |
-
 929929077You’ll Need: 1Item # 10474544
Promotions
$29.99- Color: Wood
- Size: 10" x 10"
- Color: Wood
- Size: 10" x 10"
- Color: Wood
- Size: 10" x 10"
-
 20000629You’ll Need: 1Item # 10548569
Promotions
$2.99- Color: Fire Coral
- Size: 2 oz
- Color: Fire Coral
- Size: 2 oz
- Color: Fire Coral
- Size: 2 oz
-
 20000629You’ll Need: 1Item # 10548580
Promotions
$2.99- Color: Daffodil Yellow
- Size: 2 oz
- Color: Daffodil Yellow
- Size: 2 oz
- Color: Daffodil Yellow
- Size: 2 oz
-
 20000629You’ll Need: 1Item # 10548587
Promotions
$2.99- Color: Aqua
- Size: 2 oz
- Color: Aqua
- Size: 2 oz
- Color: Aqua
- Size: 2 oz
-
 20000629You’ll Need: 1Item # 10548589
Promotions
$2.99- Color: Ink Spot
- Size: 2 oz
- Color: Ink Spot
- Size: 2 oz
- Color: Ink Spot
- Size: 2 oz
-
 20000629You’ll Need: 1Item # 10548600
Promotions
$2.99- Color: Cool Bisque
- Size: 2 oz
- Color: Cool Bisque
- Size: 2 oz
- Color: Cool Bisque
- Size: 2 oz
-
 20000629You’ll Need: 1Item # 10548604
Promotions
$2.99- Color: Patina
- Size: 2 oz
- Color: Patina
- Size: 2 oz
- Color: Patina
- Size: 2 oz
-
 20000629You’ll Need: 1Item # 10622082
Promotions
$2.99- Color: Daybreak
- Size: 2 oz
- Color: Daybreak
- Size: 2 oz
- Color: Daybreak
- Size: 2 oz
Products
-

-

-
 845161576You’ll Need: 1Item # 10472892
Promotions
$5.99- Color: Master
- Size: 1"
- Color: Master
- Size: 1"
- Color: Master
- Size: 1"
Products
- Pencil
- Computer
- Printer
| Step 1 |
Use your 1" [2.54 cm] flat brush to paint your entire canvas with Ink Spot acrylic paint. Let dry. |
| Step 2 |
Click here to download and print the template. |
| Step 3 |
Cut out an 11" x 11" [27.94 cm x 27.94 cm] piece of transfer paper. Tape the transfer paper to the sides of your canvas. Tape the mandala pattern down on the centre of your canvas. Make sure the waxy side of your transfer paper is flush to your canvas. Tape the pattern on top of your transfer paper. |
| Step 4 |
Use your pencil to trace every dot on your pattern. |
| Step 5 |
Remove the pattern and transfer paper from your canvas. |
| Step 6 |
Use your dotter tools and multi-surface satin acrylic paints to make dots on your mandala pattern until your pattern is filled in. Use the appropriately sized dotter tool for each dot. |